
WordPress Speed Optimization: 15 Proven Ways to Speed Up Your Site
A practical, step-by-step guide to making your WordPress site load faster. From hosting and caching to Core Web Vitals and automated monitoring, these 15 techniques are ranked by impact.
Table of Contents
- Why WordPress Speed Matters More Than Ever
- How to Measure Your WordPress Site Speed
- 1. Choose the Right Hosting Provider
- 2. Set Up Page Caching
- 3. Optimize Images (The Biggest Quick Win)
- 4. Use a Content Delivery Network
- 5. Minify CSS, JavaScript, and HTML
- 6. Clean Up Your Database
- 7. Audit and Reduce Plugin Bloat
- 8. Enable Lazy Loading
- 9. Optimize Web Fonts
- 10. Upgrade to the Latest PHP Version
- 11. Fix Core Web Vitals Issues
- 12. Eliminate Render-Blocking Resources
- 13. Limit the WordPress Heartbeat API
- 14. Set Up Automated Speed Monitoring
- 15. Your WordPress Speed Optimization Checklist
- Frequently Asked Questions
Why WordPress Speed Matters More Than Ever
Every second your WordPress site takes to load costs you visitors, sales, and search rankings. Google confirmed that page speed is a direct ranking factor, and their Core Web Vitals update made performance even more critical for SEO.
Speed also impacts your WooCommerce SEO rankings directly. The numbers tell a clear story. A one-second delay in page load time reduces conversions by 7%. Pages that load in under 2 seconds have an average bounce rate of 9%, while pages taking 5 seconds see bounce rates jump to 38%. For WooCommerce stores, this translates directly into lost revenue.
The good news? Most WordPress speed issues are fixable without touching code. This guide walks you through 15 proven optimization techniques, ranked by impact, so you can start with the changes that make the biggest difference.
How to Measure Your WordPress Site Speed
Before making changes, you need a baseline. You cannot improve what you do not measure. Use these free tools to test your current performance:
Google PageSpeed Insights analyzes your page and gives separate scores for mobile and desktop. It also shows Core Web Vitals data from real users when available. Aim for a score above 90.
GTmetrix provides a detailed waterfall chart showing exactly which resources take the longest to load. This is invaluable for identifying bottlenecks. You can test from multiple locations worldwide.
WebPageTest offers advanced testing with multi-step transactions, video capture, and content blocking. It is the tool most performance engineers rely on for deep analysis.
Run tests from at least two tools and test both your homepage and a content-heavy page (like a product page or blog post). Record your scores. You will compare them after each optimization step.
1. Choose the Right Hosting Provider
Your hosting provider is the foundation of your site speed. No amount of optimization can compensate for a slow server.
Shared hosting is where most WordPress sites start, and where most speed problems begin. You share server resources with hundreds of other websites. When one site gets a traffic spike, everyone else slows down.
Managed WordPress hosting is the sweet spot for most sites. Providers like Cloudways, Kinsta, and WP Engine optimize their infrastructure specifically for WordPress. They include server-level caching, automatic updates, and CDN integration. Expect to pay $25 to $50 per month, but the performance difference is dramatic.
VPS or dedicated hosting gives you guaranteed resources. This makes sense once your site receives consistent traffic above 50,000 monthly visitors or runs a WooCommerce store with heavy database queries.
The single most impactful change most site owners can make is switching from shared hosting to managed WordPress hosting. Response times typically drop from 800ms to under 200ms.
2. Set Up Page Caching
WordPress generates pages dynamically by running PHP code and querying the database on every request. Caching stores the finished HTML so it can be served instantly without rebuilding the page each time.
Page caching is the most important type. It stores complete HTML pages and serves them to visitors without any PHP execution. This alone can reduce page load times by 50% or more.
The best caching plugins for WordPress in 2026:
WP Rocket is the easiest to configure and delivers excellent results out of the box. It handles page caching, browser caching, GZIP compression, and cache preloading in one plugin. It is a paid plugin starting at $59 per year.
W3 Total Cache is free and extremely powerful, but the settings can overwhelm beginners. It supports page cache, object cache, database cache, and browser cache.
LiteSpeed Cache is free and works best on LiteSpeed web servers. If your host runs LiteSpeed (many managed hosts do), this is the optimal choice.
Whichever plugin you choose, enable these settings: page caching, GZIP compression, browser caching with long expiry headers, and cache preloading. Exclude dynamic pages like cart, checkout, and account pages from caching.
3. Optimize Images (The Biggest Quick Win)
Images typically account for 50% to 80% of a WordPress page's total size. Optimizing them delivers the most dramatic speed improvement for the least effort.
Use WebP format. WebP images are 25% to 35% smaller than equivalent JPEG or PNG files with no visible quality loss. Every modern browser supports WebP. Plugins like ShortPixel or Imagify can convert your existing images automatically.
Resize before uploading. A common mistake is uploading a 4000x3000 pixel photo when it only displays at 800x600. WordPress creates multiple sizes, but the original still takes up storage and can be served in some contexts. Resize images to the maximum display size before uploading.
Compress aggressively. Most product photos and blog images look identical at 80% quality compared to 100%. That 20% reduction in quality translates to 40% to 60% smaller file sizes. Use lossy compression for photographs and lossless for graphics with text.
For WooCommerce stores with hundreds of product images, bulk optimization is essential. Tools like AI plugins for WordPress including Peligent's AI Photo Enhancement can process your entire product catalog at once, optimizing and enhancing images in bulk without manual work.
4. Use a Content Delivery Network
A CDN stores copies of your site's static files (images, CSS, JavaScript) on servers around the world. When someone visits your site, they download files from the nearest server instead of your origin server.
Cloudflare offers a generous free plan that includes CDN, DDoS protection, and basic optimization. For most WordPress sites, Cloudflare Free is sufficient. The Pro plan ($20 per month) adds automatic image optimization and Polish (lossy/lossless image compression).
BunnyCDN is a pay-as-you-go option starting at $0.01 per GB. It is fast, affordable, and easy to integrate with WordPress using a simple plugin. Great for sites with moderate traffic.
A CDN is especially important if your audience is geographically distributed. A site hosted in New York loads in 200ms for US visitors but may take 800ms for visitors in Asia without a CDN. With a CDN, everyone gets sub-300ms response times.
5. Minify CSS, JavaScript, and HTML
Minification removes unnecessary characters from code: whitespace, comments, and line breaks. It does not change functionality, just reduces file sizes by 10% to 30%.
Most caching plugins include minification. In WP Rocket, enable "Minify CSS files" and "Minify JavaScript files" under the File Optimization tab. If you use a different caching plugin, Autoptimize is an excellent free standalone option.
Combine files carefully. Combining multiple CSS or JavaScript files into one used to be best practice. With HTTP/2 (which most hosts now support), combining files is less important and can sometimes hurt performance by invalidating the cache when any file changes. Test before and after.
Defer non-critical JavaScript. JavaScript that does not affect the visible page content (analytics, chat widgets, social sharing buttons) should load after the main content renders. Add the defer attribute to these scripts or use your caching plugin's delay JavaScript feature.
6. Clean Up Your Database
WordPress databases accumulate clutter over time: post revisions, spam comments, transient options, orphaned metadata, and auto-drafts. A bloated database slows down every page load because queries take longer to execute.
Delete post revisions. WordPress saves every revision of every post by default. A site with 200 posts might have 2,000+ revisions consuming database space and slowing queries. Use WP-Optimize or Advanced Database Cleaner to remove old revisions. Then limit future revisions by adding define('WP_POST_REVISIONS', 5); to your wp-config.php file.
Remove transient options. Transients are temporary cached data stored in the database. Expired transients should be cleaned up automatically, but many plugins leave orphaned transients behind. Clean these monthly.
Optimize database tables. MySQL tables fragment over time, similar to a hard drive. Running OPTIMIZE TABLE commands (or clicking "Optimize" in WP-Optimize) reorganizes data for faster queries. This is especially impactful for WooCommerce stores with large order and product tables.
7. Audit and Reduce Plugin Bloat
Every active plugin adds PHP code that runs on each page load. Some plugins are well-optimized and add less than 1ms of load time. Others can add 500ms or more by loading scripts and styles on every page, even where they are not needed.
Identify slow plugins. The Query Monitor plugin shows exactly how much time each plugin adds to page generation. Install it, load a page, and check the "Queries by Component" section. Any plugin consistently adding more than 50ms deserves scrutiny.
Deactivate what you do not use. It sounds obvious, but many WordPress sites have 5 to 10 inactive or unnecessary plugins. Social sharing plugins, slider plugins, and page builder plugins are common culprits for adding excessive load time.
Replace multiple plugins with fewer. Instead of separate plugins for SEO, social sharing, schema markup, and redirects, use a comprehensive SEO plugin like Rank Math that handles all of these. Fewer plugins mean fewer database queries and less code to execute.
Peligent's Plugin Health Bot automates this audit process. It runs daily scans to identify plugin conflicts, outdated versions, and performance issues, then delivers actionable reports so you know exactly what to fix.
8. Enable Lazy Loading
Lazy loading delays the loading of images and iframes until they are about to scroll into view. This means the browser only downloads what is visible on screen, dramatically reducing initial page load time.
WordPress includes native lazy loading for images since version 5.5. It automatically adds loading="lazy" to image tags. However, the native implementation has limitations:
It does not lazy load background images set via CSS. It does not lazy load iframes from YouTube, Google Maps, or other embeds. And it loads all images in the viewport immediately, which is correct behavior but means above-the-fold content is not affected.
For more advanced lazy loading, WP Rocket and Perfmatters both offer iframe lazy loading and the ability to replace YouTube embeds with a lightweight placeholder until clicked. This single change can save 500KB or more per page that includes video embeds.
Important: Do not lazy load your Largest Contentful Paint (LCP) image. This is typically your hero image or featured image. Lazy loading the LCP element actually hurts performance because the browser delays loading the most important visual element. Add fetchpriority="high" to your LCP image instead.
9. Optimize Web Fonts
Custom fonts can add 100KB to 500KB to your page size and cause layout shifts as they load. Google Fonts are the most common, but even self-hosted fonts need optimization.
Self-host your fonts. Loading fonts from Google's CDN requires a DNS lookup and connection to an external server. Self-hosting eliminates this extra connection. Use the OMGF (Optimize My Google Fonts) plugin to automatically download and serve Google Fonts locally.
Use font-display: swap. This CSS property tells the browser to show text immediately using a system font, then swap in the custom font once it loads. This prevents invisible text (FOIT) and improves perceived performance. Most modern font loading plugins set this automatically.
Limit font variations. Each font weight and style is a separate file. If you load Regular, Bold, Italic, and Bold Italic for two font families, that is 8 font files. Use only the weights you actually need. Most sites work fine with Regular (400) and Bold (700) of a single font family.
Use modern formats. WOFF2 is the most efficient web font format, offering 30% better compression than WOFF. All modern browsers support WOFF2. There is no reason to include older formats like TTF or EOT in 2026.
10. Upgrade to the Latest PHP Version
PHP is the programming language that powers WordPress. Each new version brings significant performance improvements. PHP 8.3 is up to 3x faster than PHP 7.0 for WordPress workloads.
To check your current PHP version, go to Tools > Site Health in your WordPress dashboard. If you are running anything below PHP 8.1, upgrading should be a priority.
Most managed WordPress hosts let you change PHP versions from your hosting dashboard with one click. Before upgrading, test on a staging environment first. Some older plugins may not be compatible with the latest PHP version.
The performance difference between PHP 7.4 and PHP 8.2 is roughly 20% to 30% faster page generation. If you are exploring how AI is transforming WooCommerce, performance is the foundation everything else builds on. Combined with OPcache (which most hosts enable by default), upgrading PHP is one of the easiest wins available.
11. Fix Core Web Vitals Issues
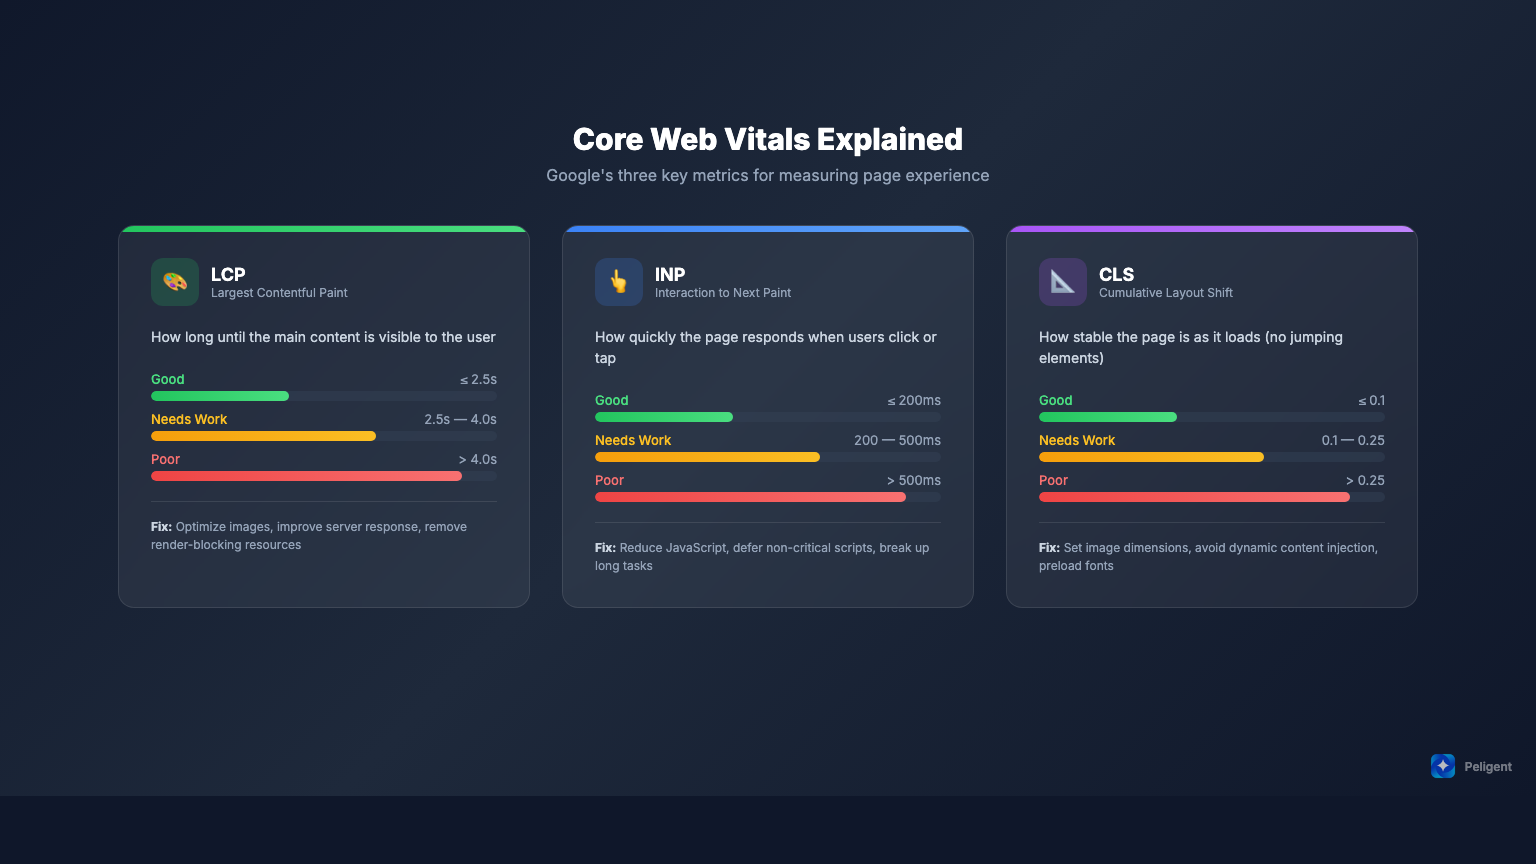
Core Web Vitals are Google's metrics for measuring real-world user experience. They directly impact search rankings. The three metrics are:
Largest Contentful Paint (LCP) measures how long it takes for the main content to appear. Target: under 2.5 seconds. The most common causes of poor LCP are slow server response, large unoptimized images, and render-blocking resources.
Interaction to Next Paint (INP) replaced First Input Delay in 2024 and measures overall page responsiveness. Target: under 200ms. Heavy JavaScript is the usual cause of poor INP. Reduce, defer, or remove non-essential JavaScript to improve this metric.
Cumulative Layout Shift (CLS) measures visual stability. Target: under 0.1. Layout shifts happen when elements move after the page appears to be loaded. Common causes: images without width/height attributes, dynamically injected content, and web fonts causing text reflow.
Google Search Console shows your Core Web Vitals performance under the Experience section. Fix the issues flagged there first, as they are based on real user data from Chrome browsers.
12. Eliminate Render-Blocking Resources
Render-blocking resources are CSS and JavaScript files that prevent the browser from displaying page content until they finish loading. Every render-blocking resource adds to Time to First Paint.
Inline critical CSS. Critical CSS is the minimal CSS needed to render above-the-fold content. Inlining it in the HTML head means the browser can start rendering immediately without waiting for external stylesheets. WP Rocket's "Remove Unused CSS" feature handles this automatically.
Defer non-critical CSS. Load remaining CSS asynchronously so it does not block rendering. The browser will apply styles as they load, but above-the-fold content already looks correct because of inlined critical CSS.
Async and defer JavaScript. The async attribute downloads scripts in parallel and executes them immediately. The defer attribute downloads in parallel but waits until HTML parsing is complete. For most third-party scripts (analytics, chat, ads), defer is the correct choice.
A practical approach: use your caching plugin to defer all JavaScript, then add exceptions for any scripts that break when deferred. This usually requires testing, but the performance gain is worth the effort.
13. Limit the WordPress Heartbeat API
The WordPress Heartbeat API sends AJAX requests to the server every 15 to 60 seconds. It powers auto-save, post locking, and real-time notifications. While useful, it creates unnecessary server load, especially when multiple browser tabs are open.
On the front-end, the Heartbeat API is rarely needed. Disable it completely on front-end pages. In the WordPress admin, reduce the frequency from 15 seconds to 60 seconds. On the post editor, keep it at 15 or 30 seconds to maintain auto-save functionality.
WP Rocket includes Heartbeat control in its settings. Alternatively, the Heartbeat Control plugin by WP Starter handles this specifically. This optimization primarily benefits server resources rather than visitor-facing speed, but it reduces overall server load which helps during traffic spikes.
14. Set Up Automated Speed Monitoring
Speed optimization is not a one-time project. Plugin updates, content changes, and theme modifications can introduce performance regressions at any time. Without monitoring, you will not know your site slowed down until visitors start leaving.
Google Search Console tracks Core Web Vitals based on real user data. Check the Experience report weekly. It flags when pages fall below Google's thresholds and shows trends over time.
Uptime monitoring tools like UptimeRobot (free for 50 monitors) alert you when your site goes down or response times exceed a threshold. Set up monitoring for your homepage, a product page, and your checkout page.
Automated performance testing catches regressions before they impact users. Schedule regular PageSpeed tests and compare scores over time. For WooCommerce stores, Peligent's Speed Monitor Bot runs weekly automated speed checks and delivers reports highlighting any slowdowns, pinpointing the cause, and suggesting specific fixes. This is especially valuable after plugin updates or theme changes when performance regressions are most likely.
15. Your WordPress Speed Optimization Checklist
Here is your complete action plan, ordered by impact:
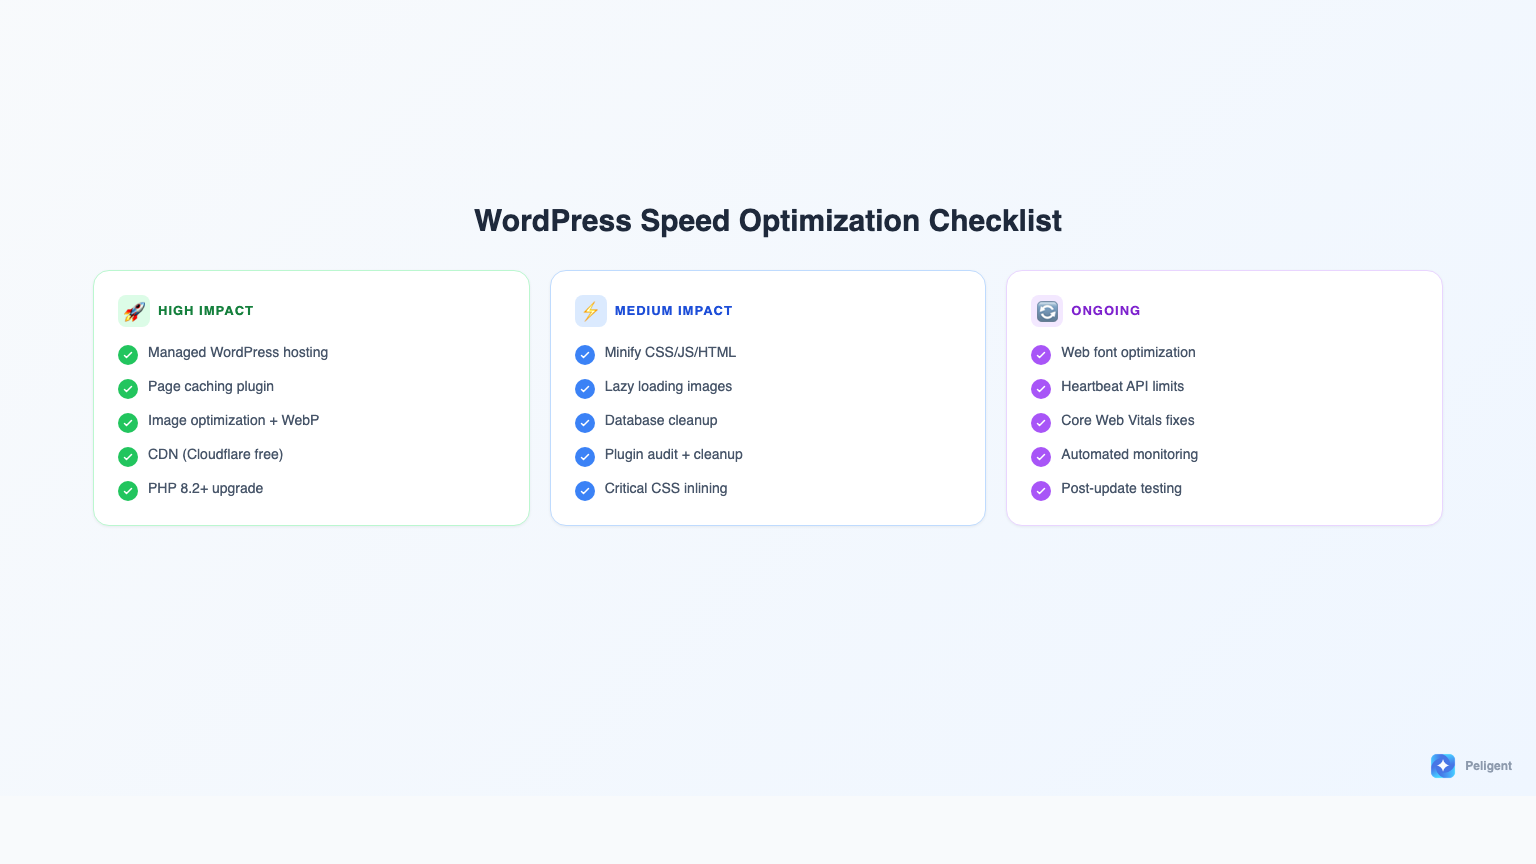
High impact (do these first):
- Switch to managed WordPress hosting if on shared hosting
- Install and configure a caching plugin (WP Rocket or LiteSpeed Cache)
- Optimize all images: compress, resize, convert to WebP
- Set up Cloudflare CDN (free plan)
- Upgrade to PHP 8.2 or higher
Medium impact (do these next):
- Minify and defer CSS/JavaScript
- Enable lazy loading for images and iframes
- Clean up and optimize your database
- Audit plugins and remove unnecessary ones
- Inline critical CSS and eliminate render-blocking resources
Ongoing maintenance:
- Self-host and optimize web fonts
- Limit the Heartbeat API
- Fix Core Web Vitals issues as they appear
- Set up automated speed monitoring
- Re-test after every major update or change
Frequently Asked Questions
What is a good page load time for WordPress?
Aim for under 2 seconds for the full page load and under 2.5 seconds for Largest Contentful Paint (LCP). Google considers pages loading in under 2.5 seconds as having "good" LCP scores. For WooCommerce stores, faster is even more important because every second of delay reduces conversions by approximately 7%.
Do I need a caching plugin if my host provides caching?
Many managed WordPress hosts include server-level caching. In that case, you may not need a page caching plugin. However, plugins like WP Rocket still add value through features like CSS/JS optimization, lazy loading, database cleanup, and CDN integration that go beyond basic page caching. Check with your host before enabling page caching in a plugin, as running two page caches can cause conflicts.
How many plugins is too many for WordPress?
There is no magic number. A site with 30 well-coded plugins can be faster than a site with 10 poorly coded ones. Focus on the quality and necessity of each plugin rather than the count. Use Query Monitor to identify which plugins actually impact performance, and remove or replace the slow ones.
Will speed optimization affect my WooCommerce store functionality?
Most speed optimizations are safe for WooCommerce, but some require caution. Always exclude cart, checkout, and my-account pages from page caching. Be careful with JavaScript deferring, as it can break checkout functionality. Test thoroughly on a staging site before applying changes to your live store.
How often should I run speed tests?
Test after every significant change: plugin updates, theme changes, adding new functionality, or publishing content-heavy pages. At minimum, run monthly tests to catch gradual performance degradation. Automated monitoring tools like Peligent's Speed Monitor Bot handle this automatically with weekly checks and alerts.
Building a fast WordPress site is just one piece of running a successful store. If you want AI-powered tools that handle speed monitoring, plugin health checks, and growth optimization automatically, try Peligent free and let AI handle the technical work while you focus on growing your business.
Written by
Wana DaliriAI content writer at Peligent. Covering WordPress, WooCommerce, and AI for e-commerce.
Enjoyed this article?
Subscribe to get more WooCommerce insights delivered to your inbox.
Related Articles
View all
Top WooCommerce Stores: 50 Successful Examples and What They Sell
Top WooCommerce Stores: 50 Successful Examples and What Makes Them Profitable WooCommerce has evolved from a simple WordPress plugin into the world's most popular ecommerce platform, powering over 6.5 million online stores worldwide. From bootstrapped startups to Fortune 500 companies, businesses across every conceivable industry rely on
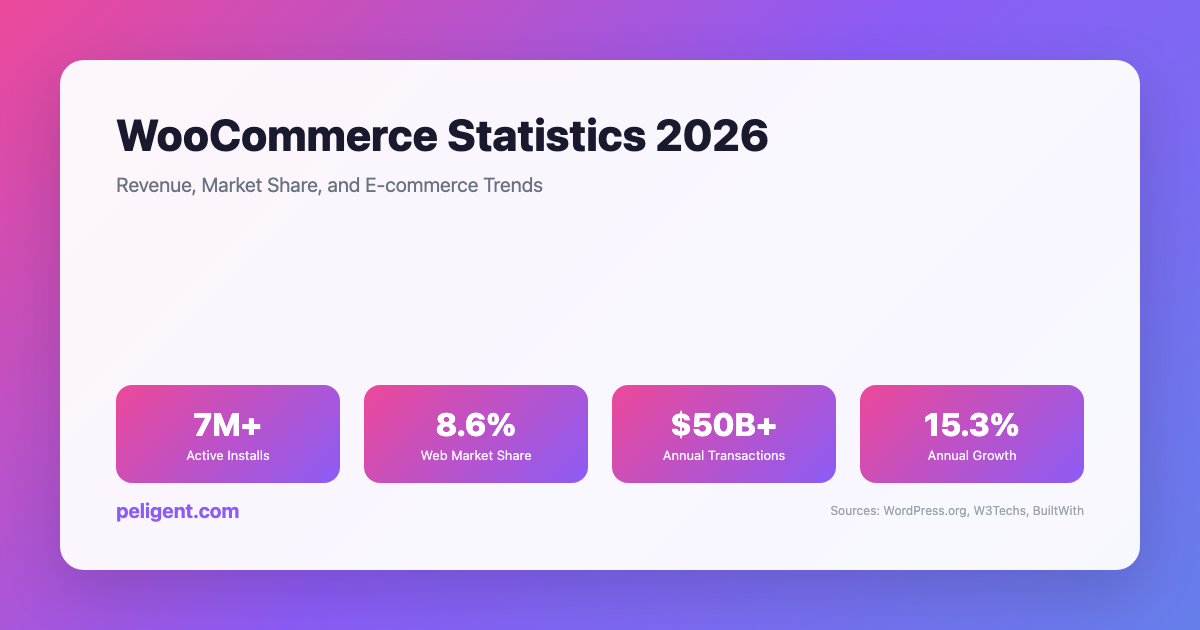
WooCommerce Statistics 2026: Revenue, Market Share, and E-commerce Trends
WooCommerce Statistics 2026: Market Share, Growth, and E-commerce Data WooCommerce has emerged as one of the world's most powerful and popular e-commerce platforms, transforming how businesses sell online. Built as a WordPress plugin, WooCommerce has grown from a simple e-commerce solution to a comprehensive platform powering millions of
AI Product Photo Enhancement for WordPress: Transform Your Store Images
Picture this: a shopper lands on your WooCommerce product page, glances at the photo for maybe half a second, and decides whether to stay or bounce. If the image looks dim, cluttered, or amateurish, they are gone before they even read the product title. If it looks clean, bright, and